VoiceOver on iOS
This guide is for developers, product managers, and auditors who don't work with assistive technology (AT) day to day. It walks you through VoiceOver, the screen reader built into every iPhone and iPad, so you can confirm accessibility issues in your own apps.
Note: The screenshots in this guide were taken with VoiceOver on iOS 26.6. On other iOS versions, some screens may look different, and some settings may be in different locations.
Why this guide matters
Many accessibility issues in mobile apps can only be confirmed by using the app the way a screen reader user does. iOS ships with VoiceOver, so any iPhone already has everything required. Ten minutes with VoiceOver is often enough to confirm or rule out an issue that automated testing flagged.
VoiceOver in a nutshell
VoiceOver reads the screen aloud and lets you operate the whole device with touch gestures. It doesn't read the pixels, it reads the accessibility tree: the elements your app exposes, with their accessible names, traits (such as button or heading), and values or states. This is why a button that looks fine on screen can still be announced as just “button.”
When VoiceOver is on, the usual touch gestures change:
| Layer | What it controls | Sample gestures |
|---|---|---|
| VoiceOver cursor | Which element VoiceOver is on | Swipe right / left with one finger: move to the next or previous element |
| Activation | Operating the element under the cursor | Double tap with one finger: activate the selected element |
| Rotor | How swiping up and down moves, for example by heading or by link | Rotate two fingers on the screen, like turning a dial |
Before you start: staying in control
The first time VoiceOver starts talking, it can feel overwhelming, and the phone no longer responds to touch the way you expect. That's normal. Set up an easy way out before you turn VoiceOver on:
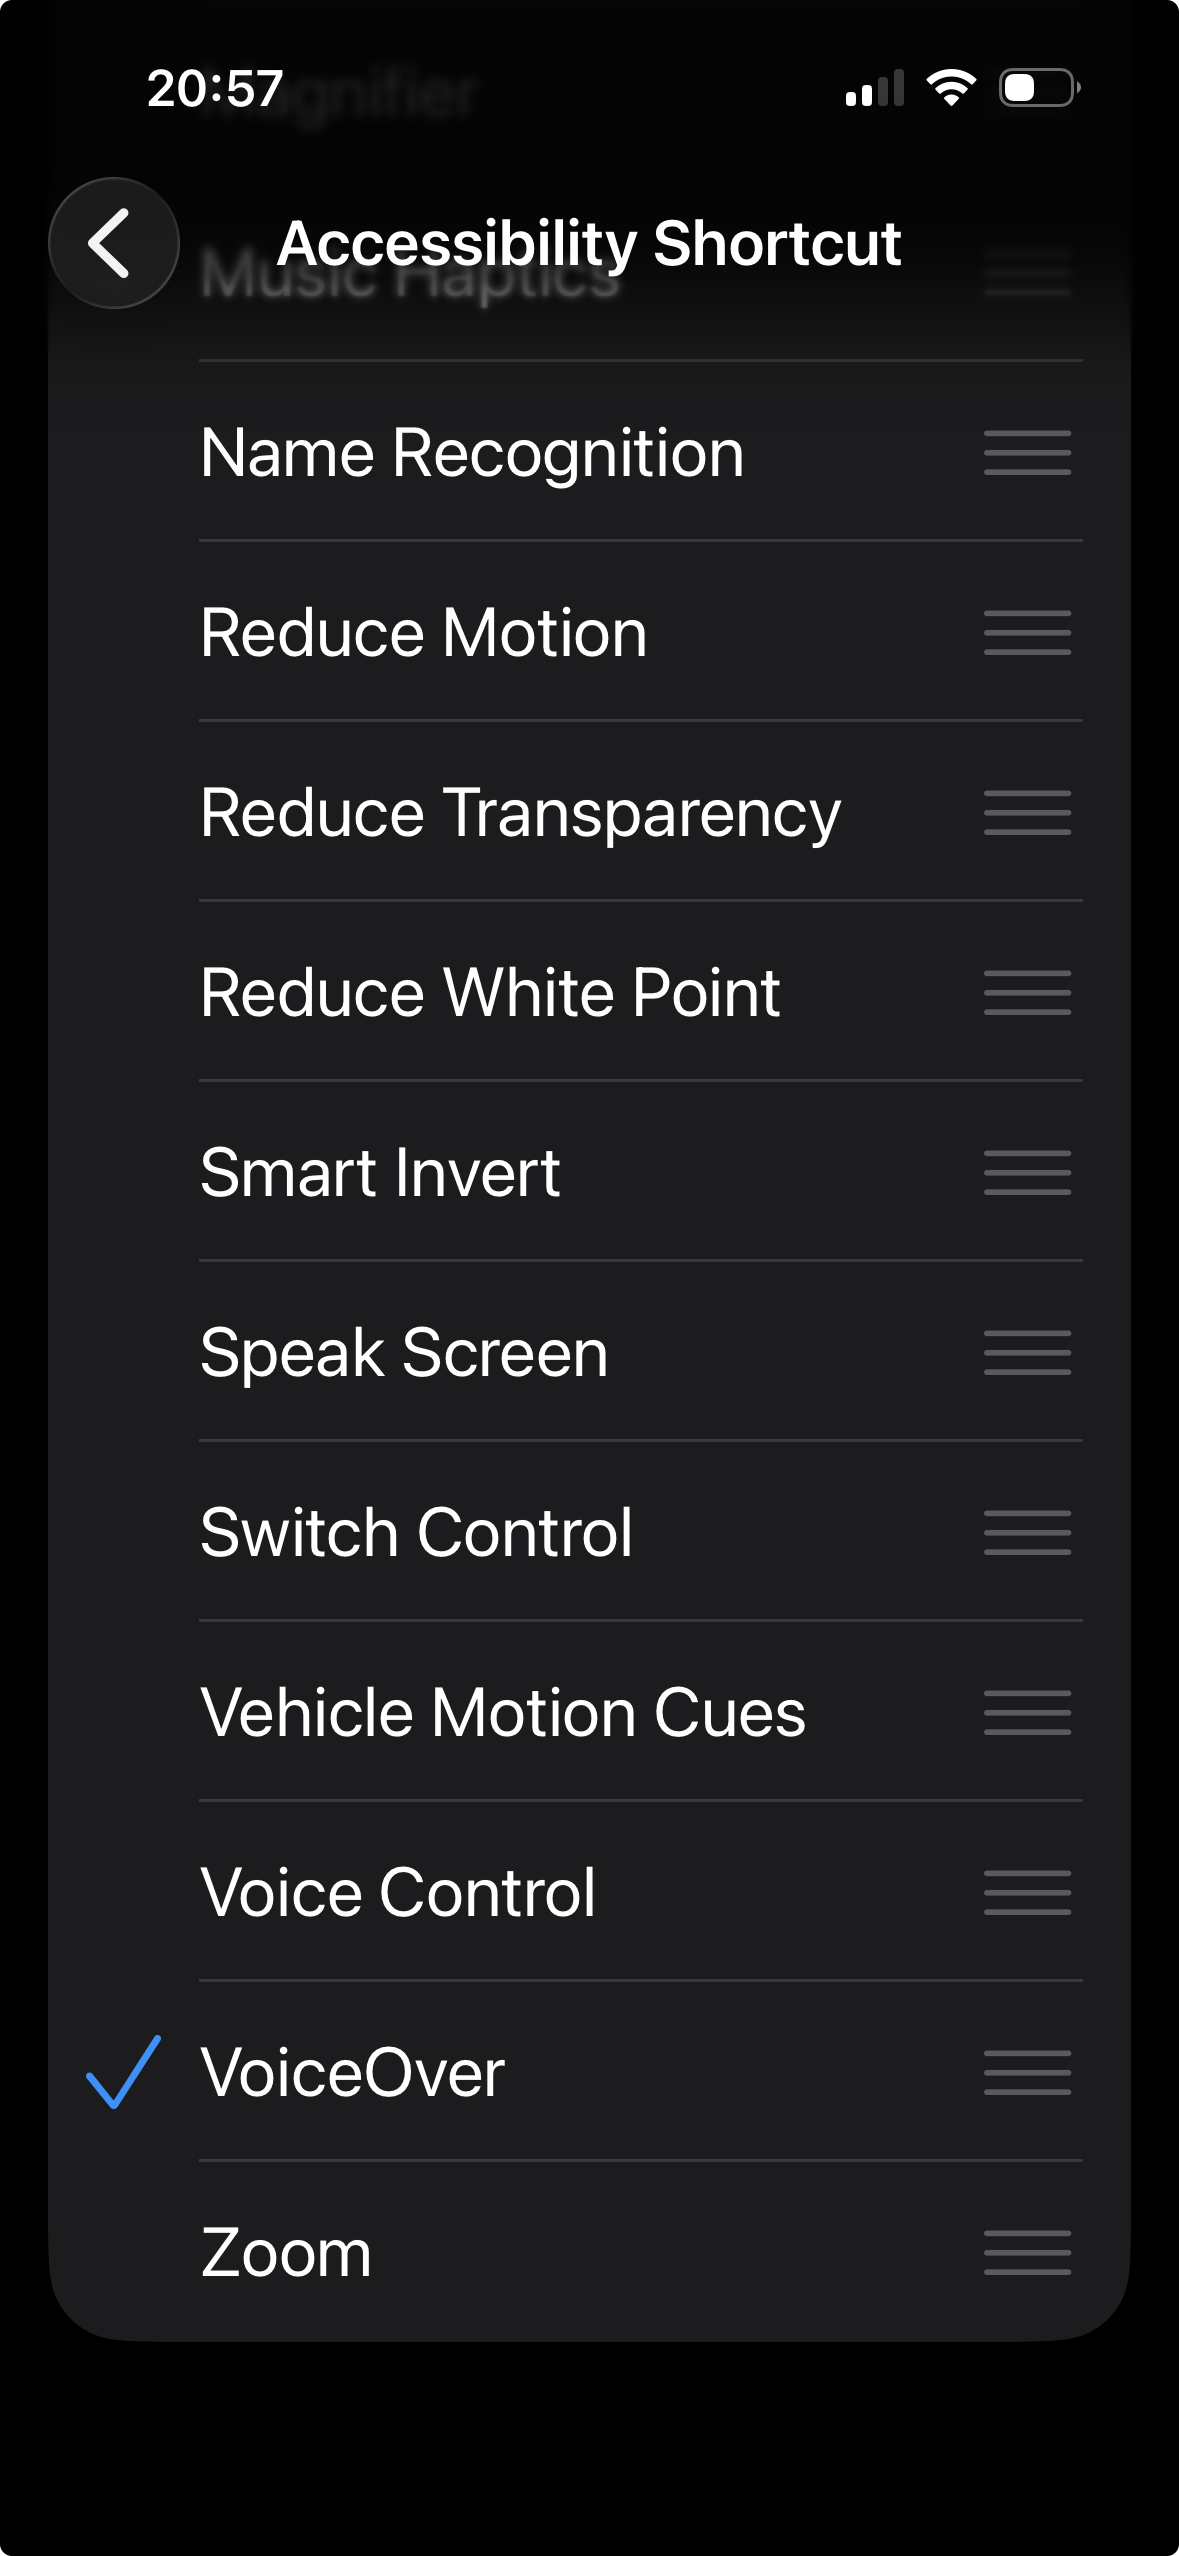
- Set up the Accessibility Shortcut – Go to Settings › Accessibility › Accessibility Shortcut, and select VoiceOver. From then on, triple-click the side button (or the Home button, on iPhones that have one) to turn VoiceOver on or off at any time.
- Pause speech – Tap the screen with two fingers to pause VoiceOver. Tap with two fingers again to continue.
- If the screen goes black – You turned on the screen curtain, which hides the display while VoiceOver keeps working. Triple-tap the screen with three fingers to turn it off.
- If VoiceOver goes silent – You may have muted it. Double-tap the screen with three fingers to unmute.
Note: VoiceOver can also display everything it speaks as text in the caption panel at the bottom of the screen. As a sighted tester, turn it on in Settings › Accessibility › VoiceOver › Caption Panel. It lets you read the announcements instead of relying on audio alone.
Setup and first-run checklist
-
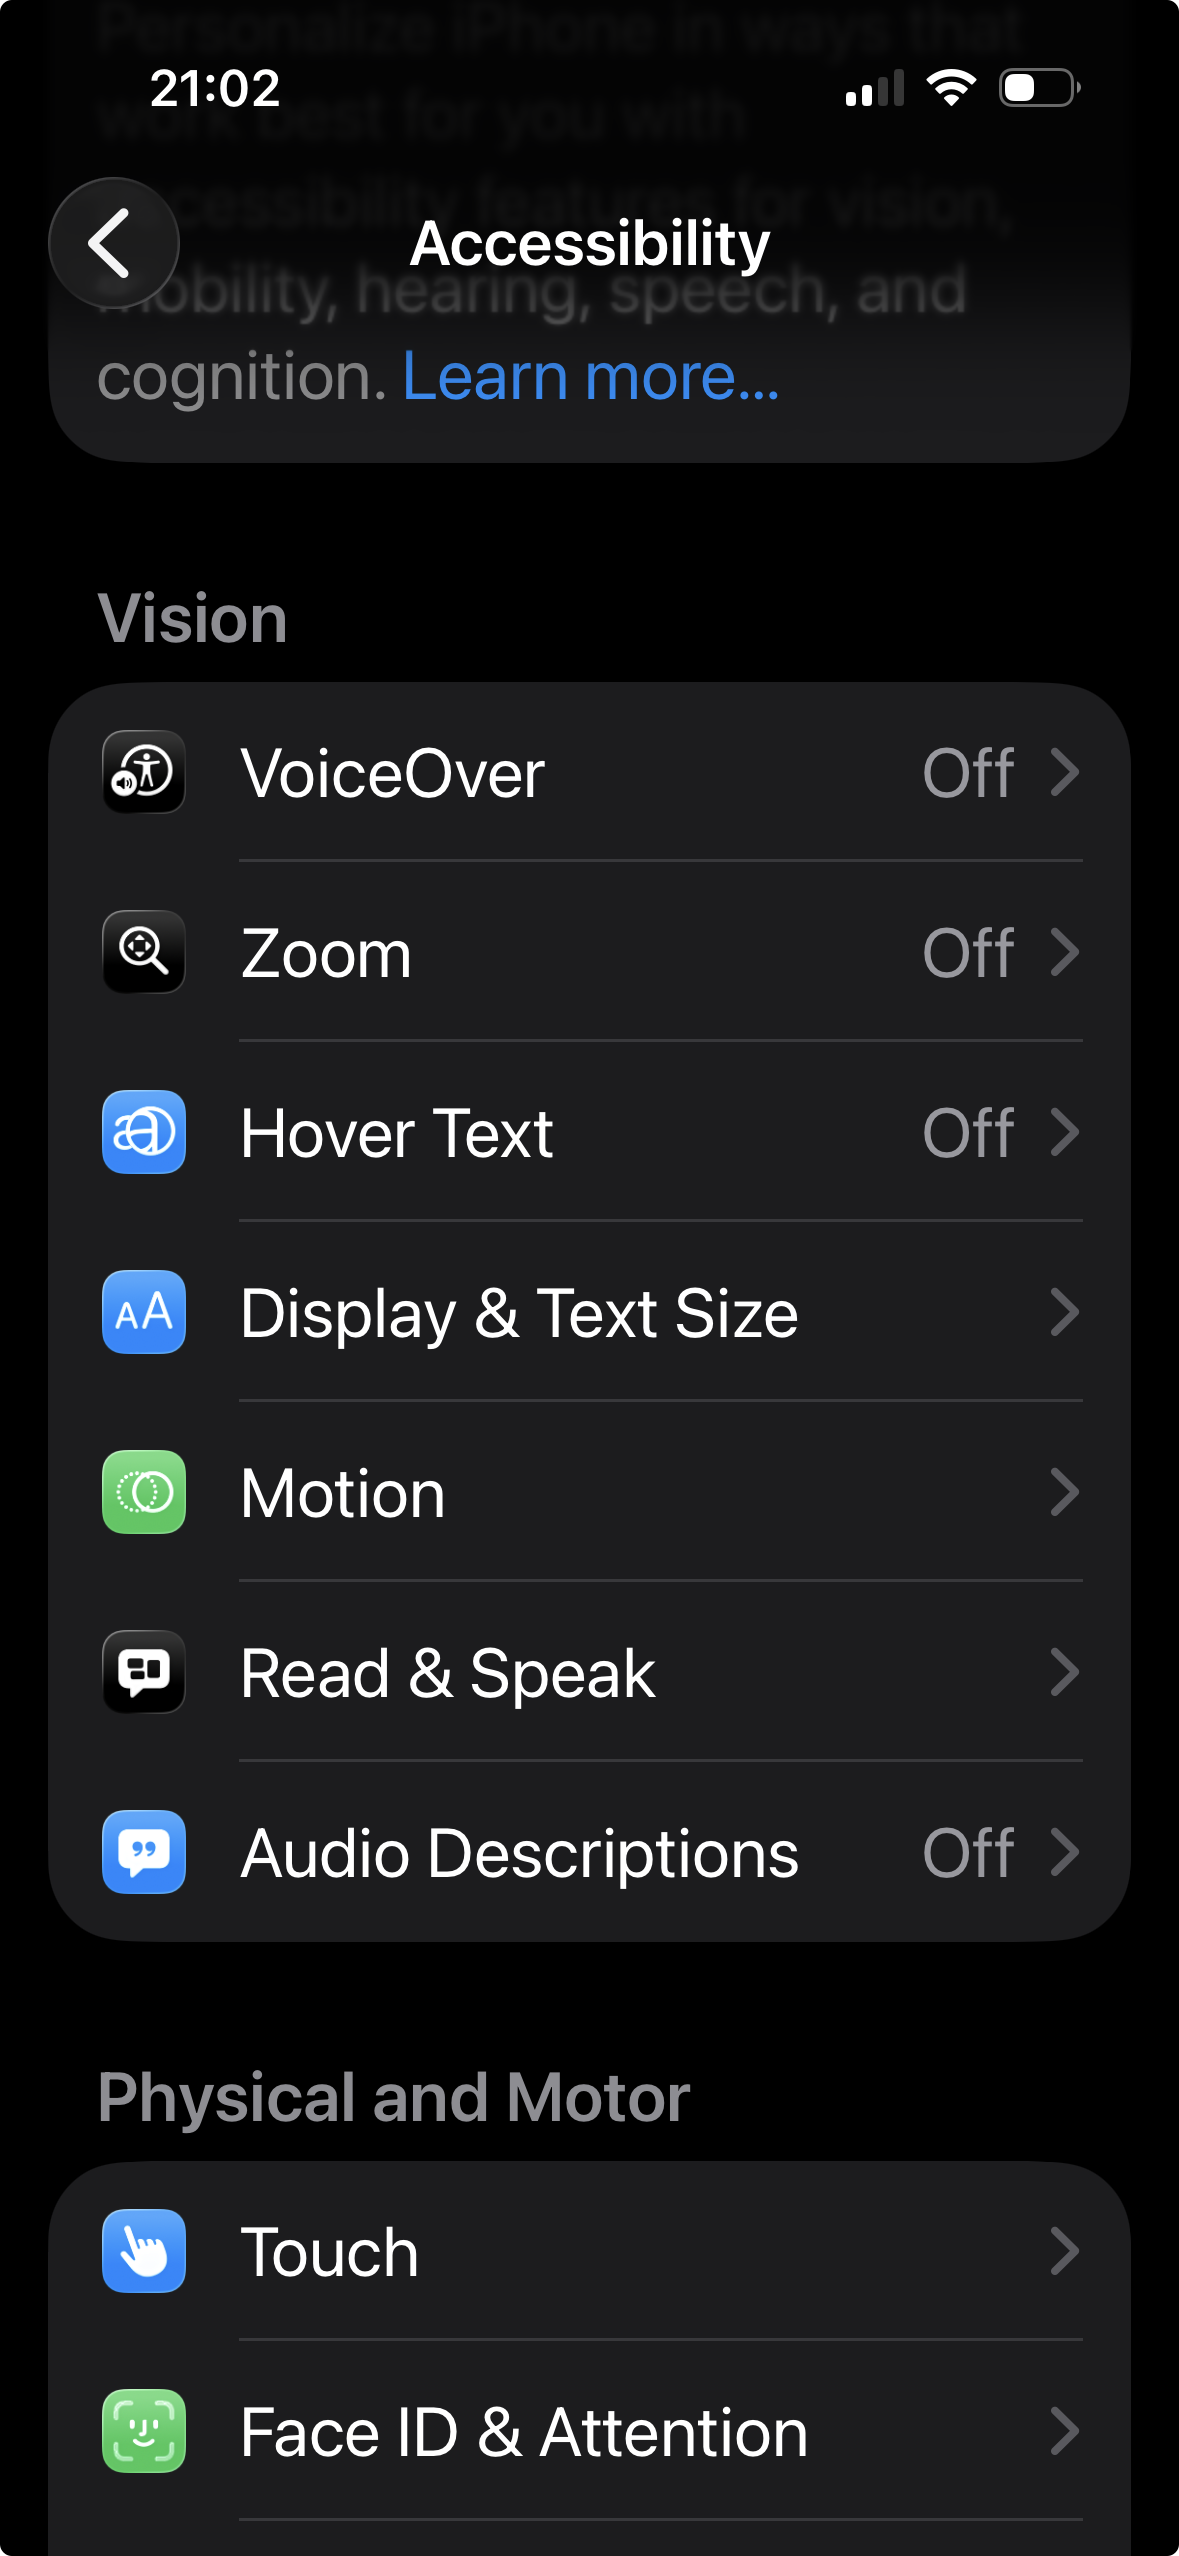
Turn on VoiceOver – Go to Settings › Accessibility › VoiceOver, and turn on VoiceOver. You can also triple-click the side button, if you set up the Accessibility Shortcut, or ask Siri to “Turn on VoiceOver.”
-
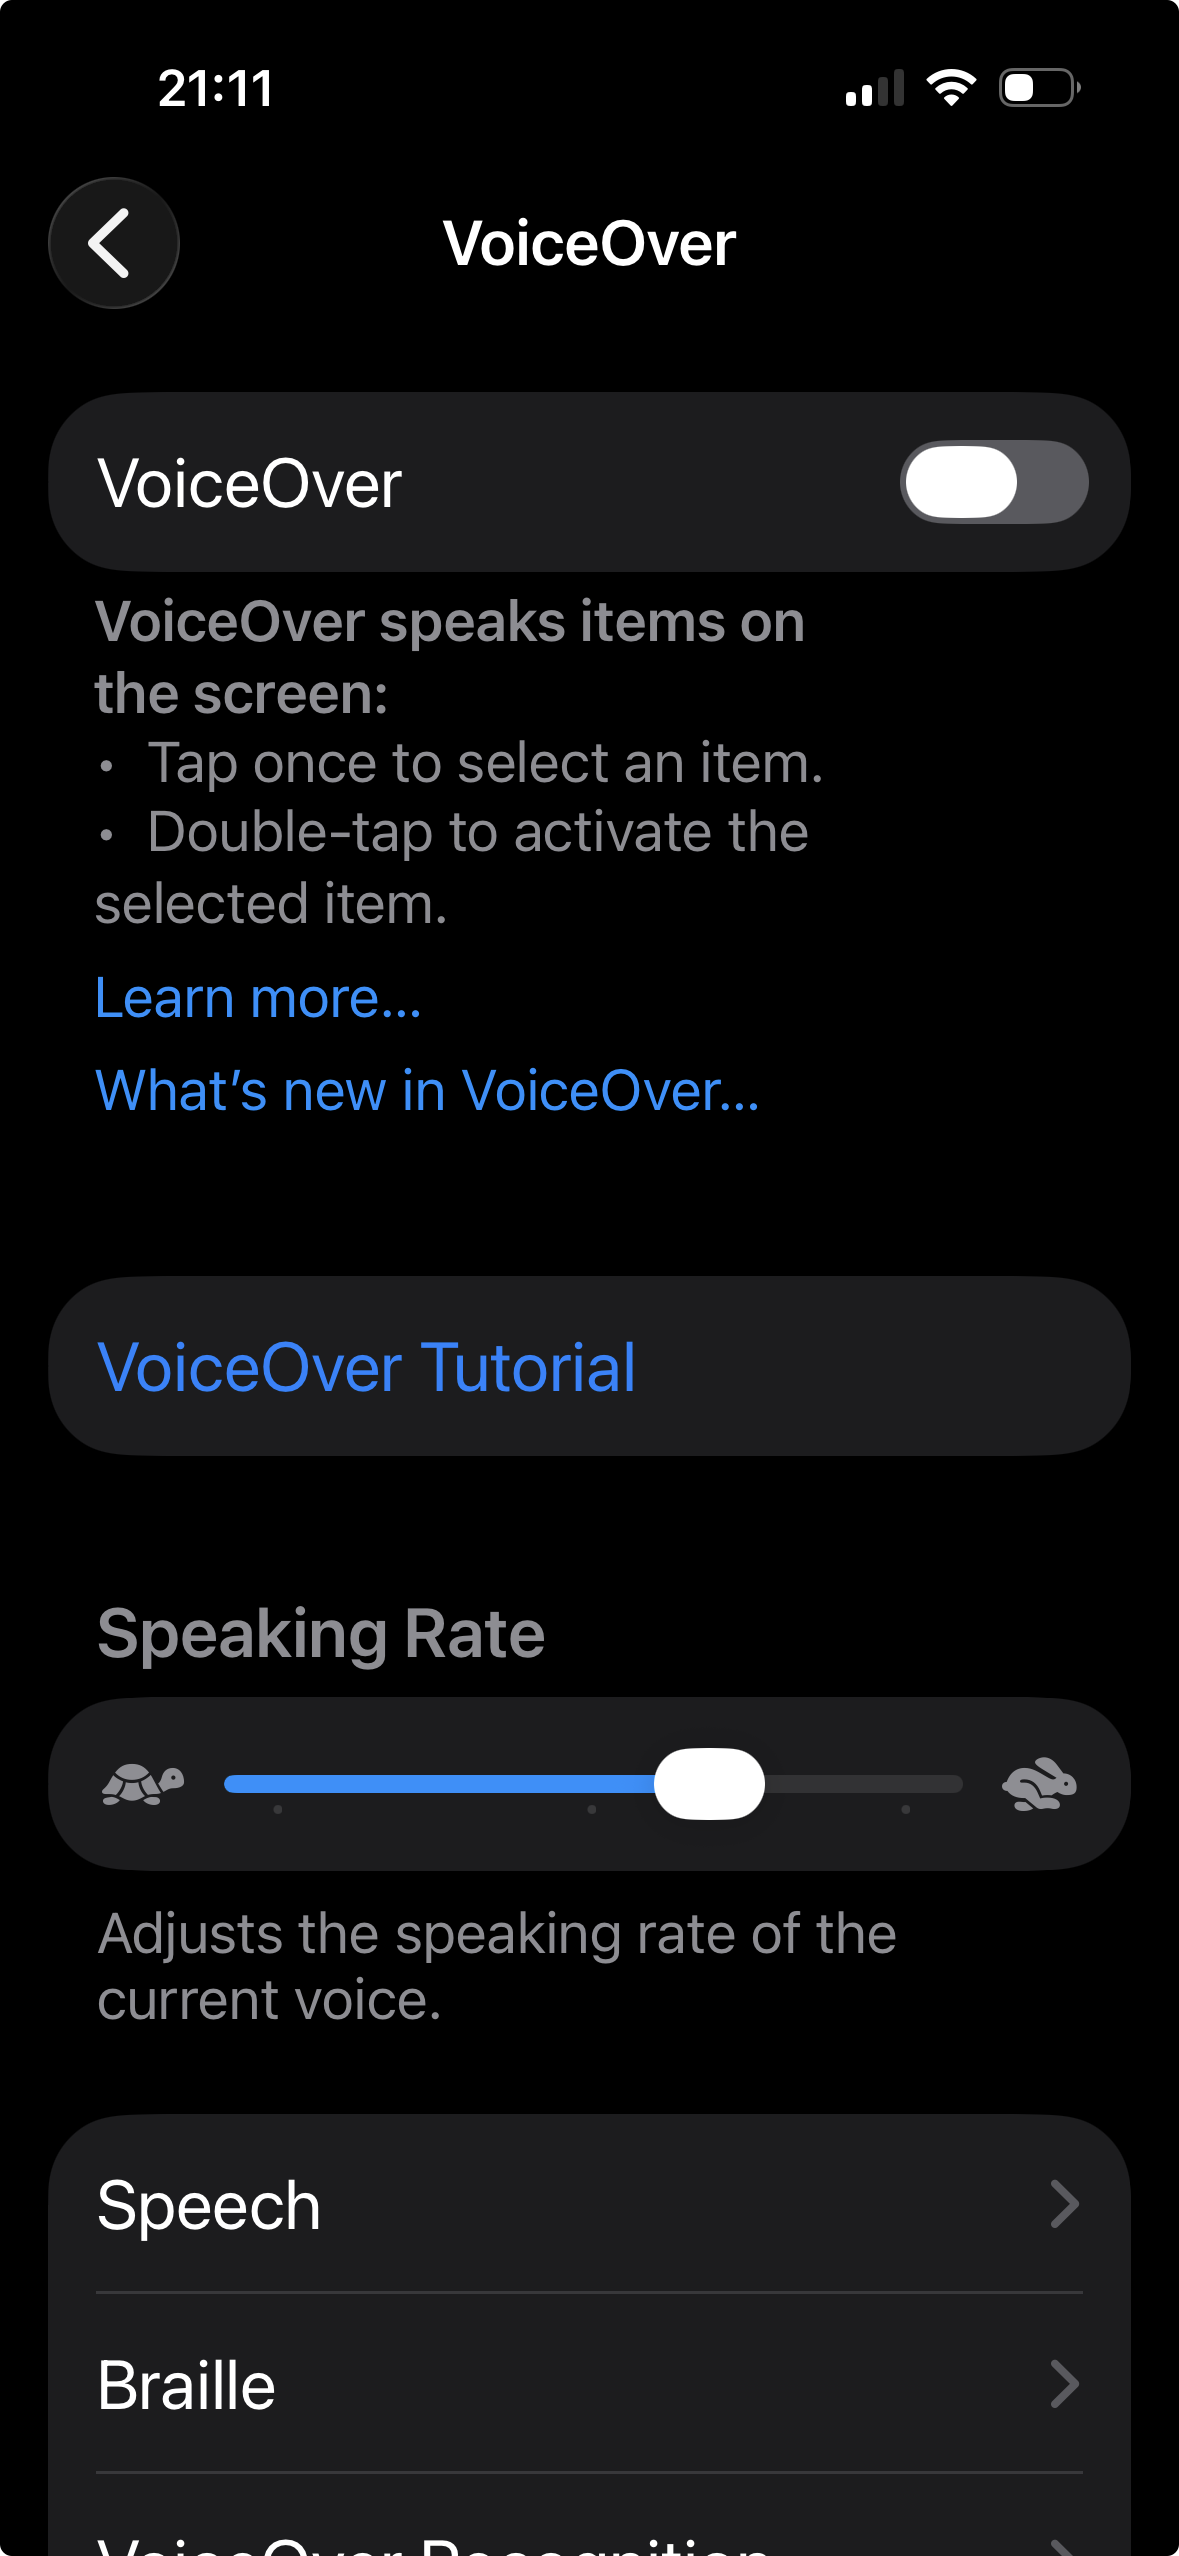
Slow down the speech – Opening a screen reader for the first time can be overwhelming. On the VoiceOver settings screen, drag the Speaking Rate slider toward the turtle to make VoiceOver speak more slowly.
-
Run the tutorial – With VoiceOver on, go to Settings › Accessibility › VoiceOver, and tap VoiceOver Tutorial. It teaches the essential gestures in a few minutes. We recommend it for every first-time user.
-
Practice the gestures – On the same screen, tap VoiceOver Practice, then double-tap to start. You can try any gesture and hear what it does, without changing anything on the device. When you finish, tap Done, then double-tap to exit.
Note: When VoiceOver is on, unlocking the device also works differently: tap a key on the passcode screen to select it, then double-tap to enter it.
Core concepts
The VoiceOver cursor
The VoiceOver cursor is the outline that shows which element is currently selected and being read. Swipe right with one finger to move it to the next element, and swipe left to move it back. You can also touch the screen, or drag a finger across it, to move the cursor to whatever is under your finger. This is called touch exploration.

Selection vs. activation
Moving the cursor to an element only selects it, it doesn't activate it. To activate the selected element, such as pressing a button or opening a link, double-tap anywhere on the screen. You don't need to tap on the element itself.
The Rotor
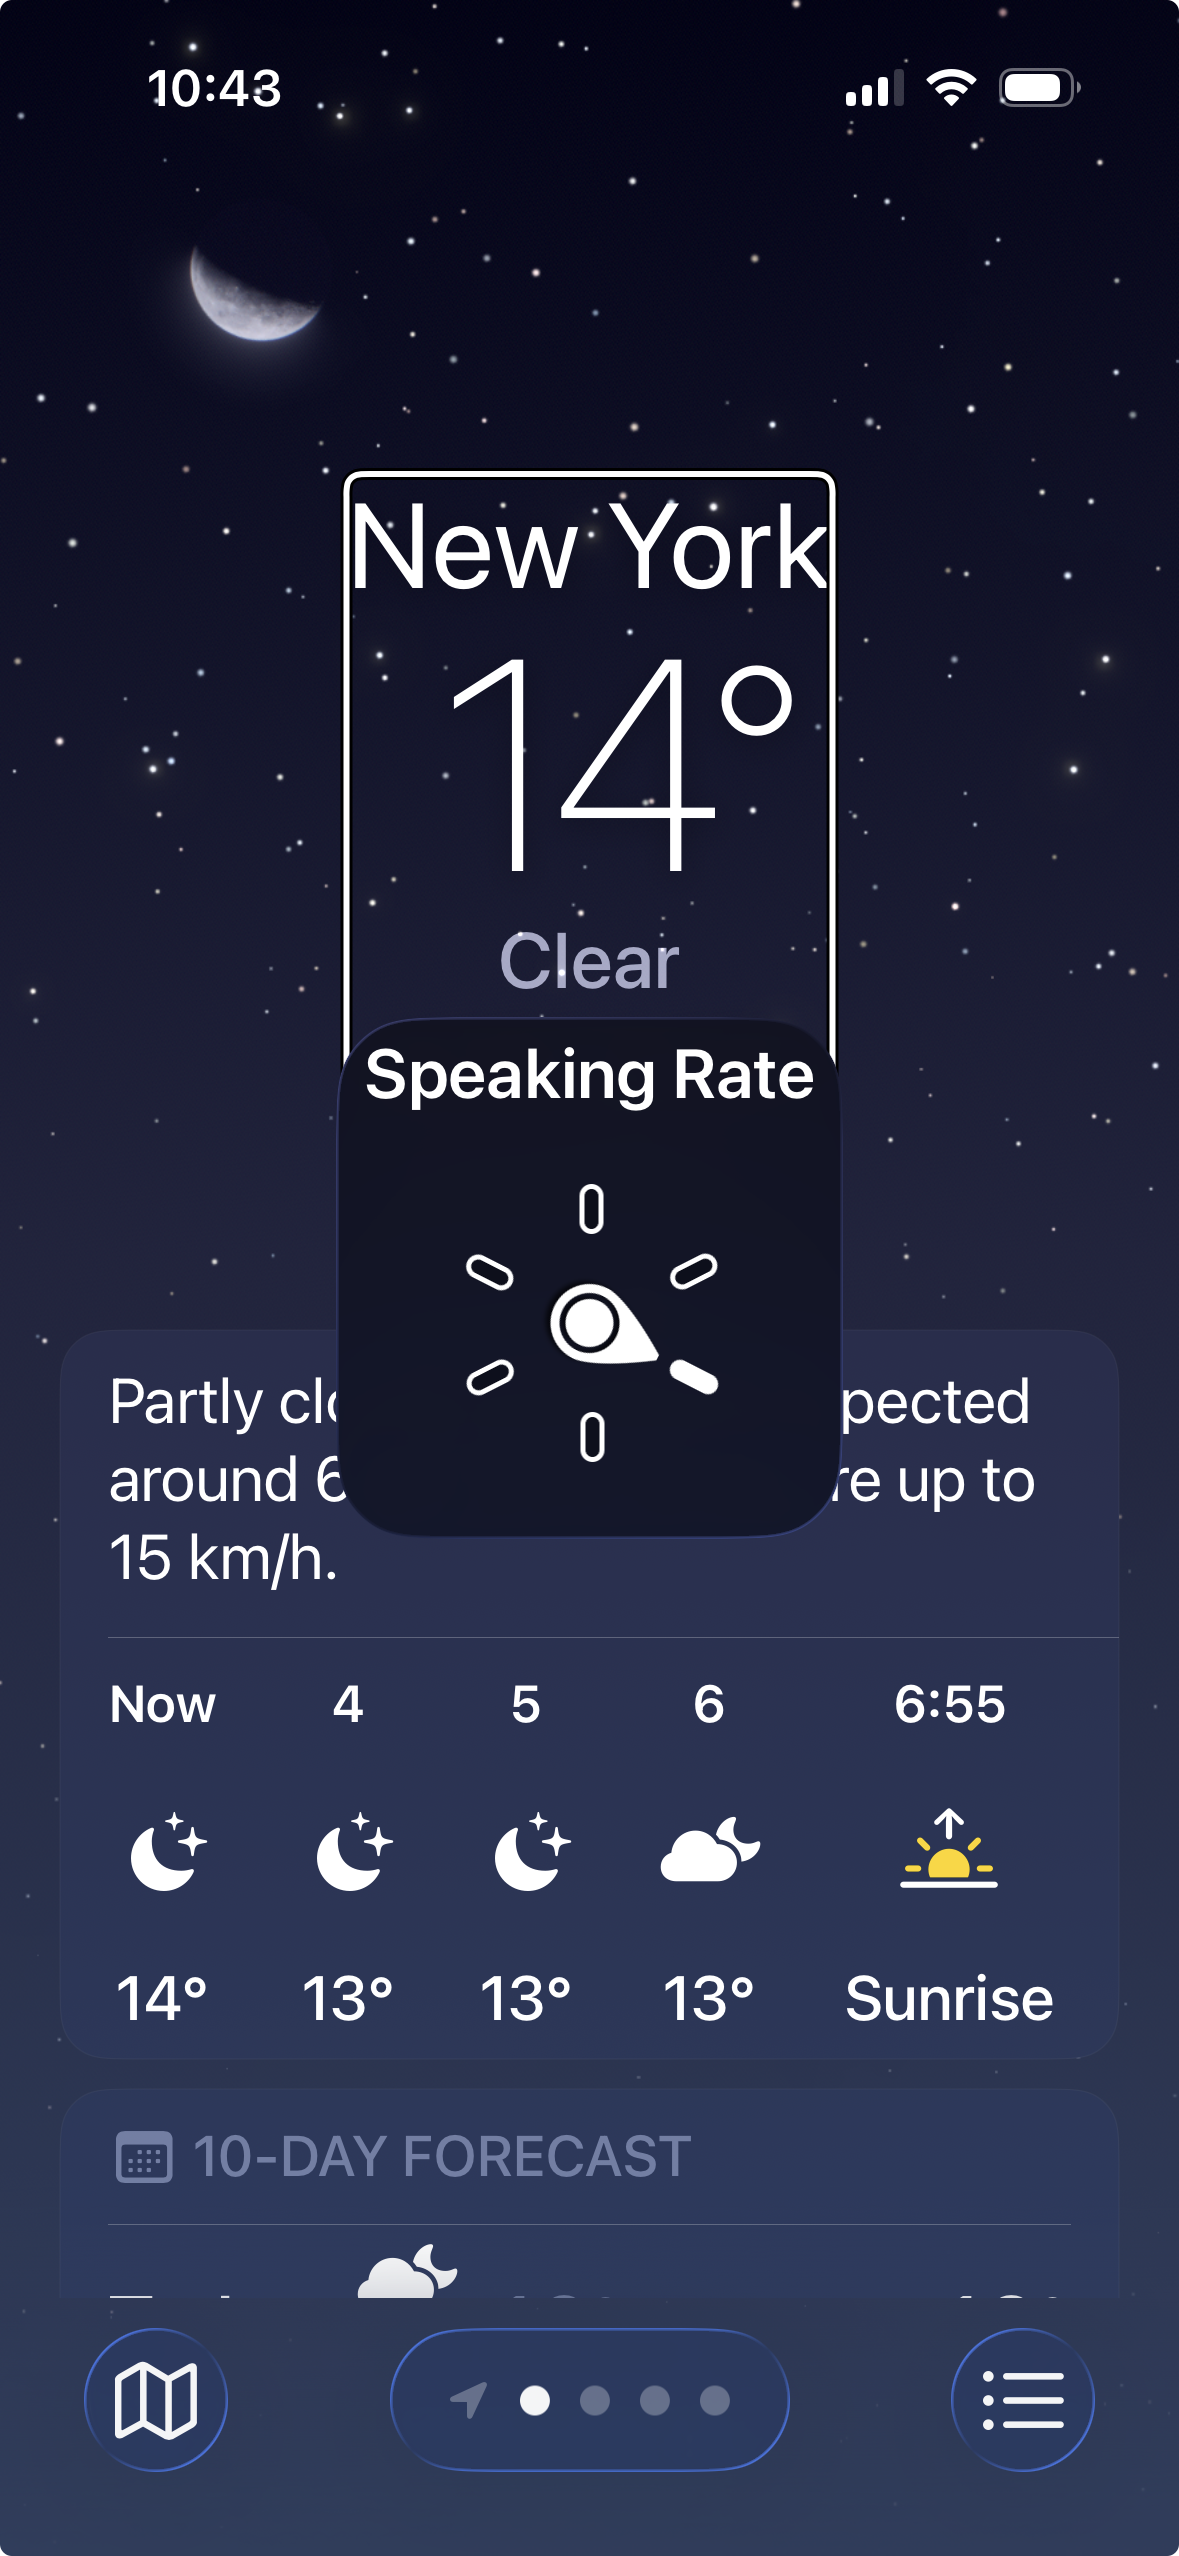
The rotor changes what happens when you swipe up or down with one finger. Rotate two fingers on the screen, like turning a dial, to choose a setting, such as Headings, Links, Form Controls, Characters, Words, or Speaking Rate. Then swipe down with one finger to move to the next item of that type, or swipe up to move to the previous one. You can choose which settings appear in Settings › Accessibility › VoiceOver › Rotor.
Scrolling and reading
With VoiceOver on, swiping with one finger moves the cursor instead of scrolling. To scroll, swipe with three fingers. To have VoiceOver read the whole screen, swipe up with two fingers to start from the top, or swipe down with two fingers to start from the selected element.
Your first walkthrough
How to read the table
The announcement column is abridged, the exact wording varies by iOS version and by the VoiceOver settings you choose.
Basic app test
| Step | Gesture | What to check |
|---|---|---|
| Open the app you want to test | Tap its icon, before turning VoiceOver on | The app's first screen is displayed |
| Turn on VoiceOver | Triple-click the side button | “VoiceOver on”, then the selected element |
| Go to the first element | Tap near the top of the screen with four fingers | The first element on the screen is announced |
| Move through the screen | Swipe right with one finger, repeatedly | Every interactive element and every piece of essential content is announced, in a logical order |
| Check each control | Listen to each announcement | Each interactive element has a clear accessible name and a type, such as “button”, and announces its state or value, such as “on” or “selected” |
| Check the images | Move to each meaningful image | Each image has a text alternative that conveys its purpose |
| Activate a control | Double-tap anywhere on the screen | The control performs its action |
| Go back | Scrub two fingers back and forth quickly, like a “Z” | The previous screen, or the dismissed alert |
| Turn off VoiceOver | Triple-click the side button | “VoiceOver off” |
Settings worth changing
VoiceOver has many settings under Settings › Accessibility › VoiceOver. These matter most for testing:
| Setting | Why it matters | What to change |
|---|---|---|
| Speaking Rate | Default speech can be too fast for beginners | Slow it down, then speed it up as you get comfortable |
| Caption Panel | Reading announcements is easier than hearing them | Turn it on |
| Speech | Voices and languages affect how text is read | Choose the primary voice, and add voices you can switch to with the rotor |
| Rotor | The settings you need for testing may not all be listed | Make sure Headings, Links, Form Controls, and Containers are on |
| Commands › Touch Gestures | Lists every gesture and what it does | Use it as a reference, and to reassign gestures if needed |
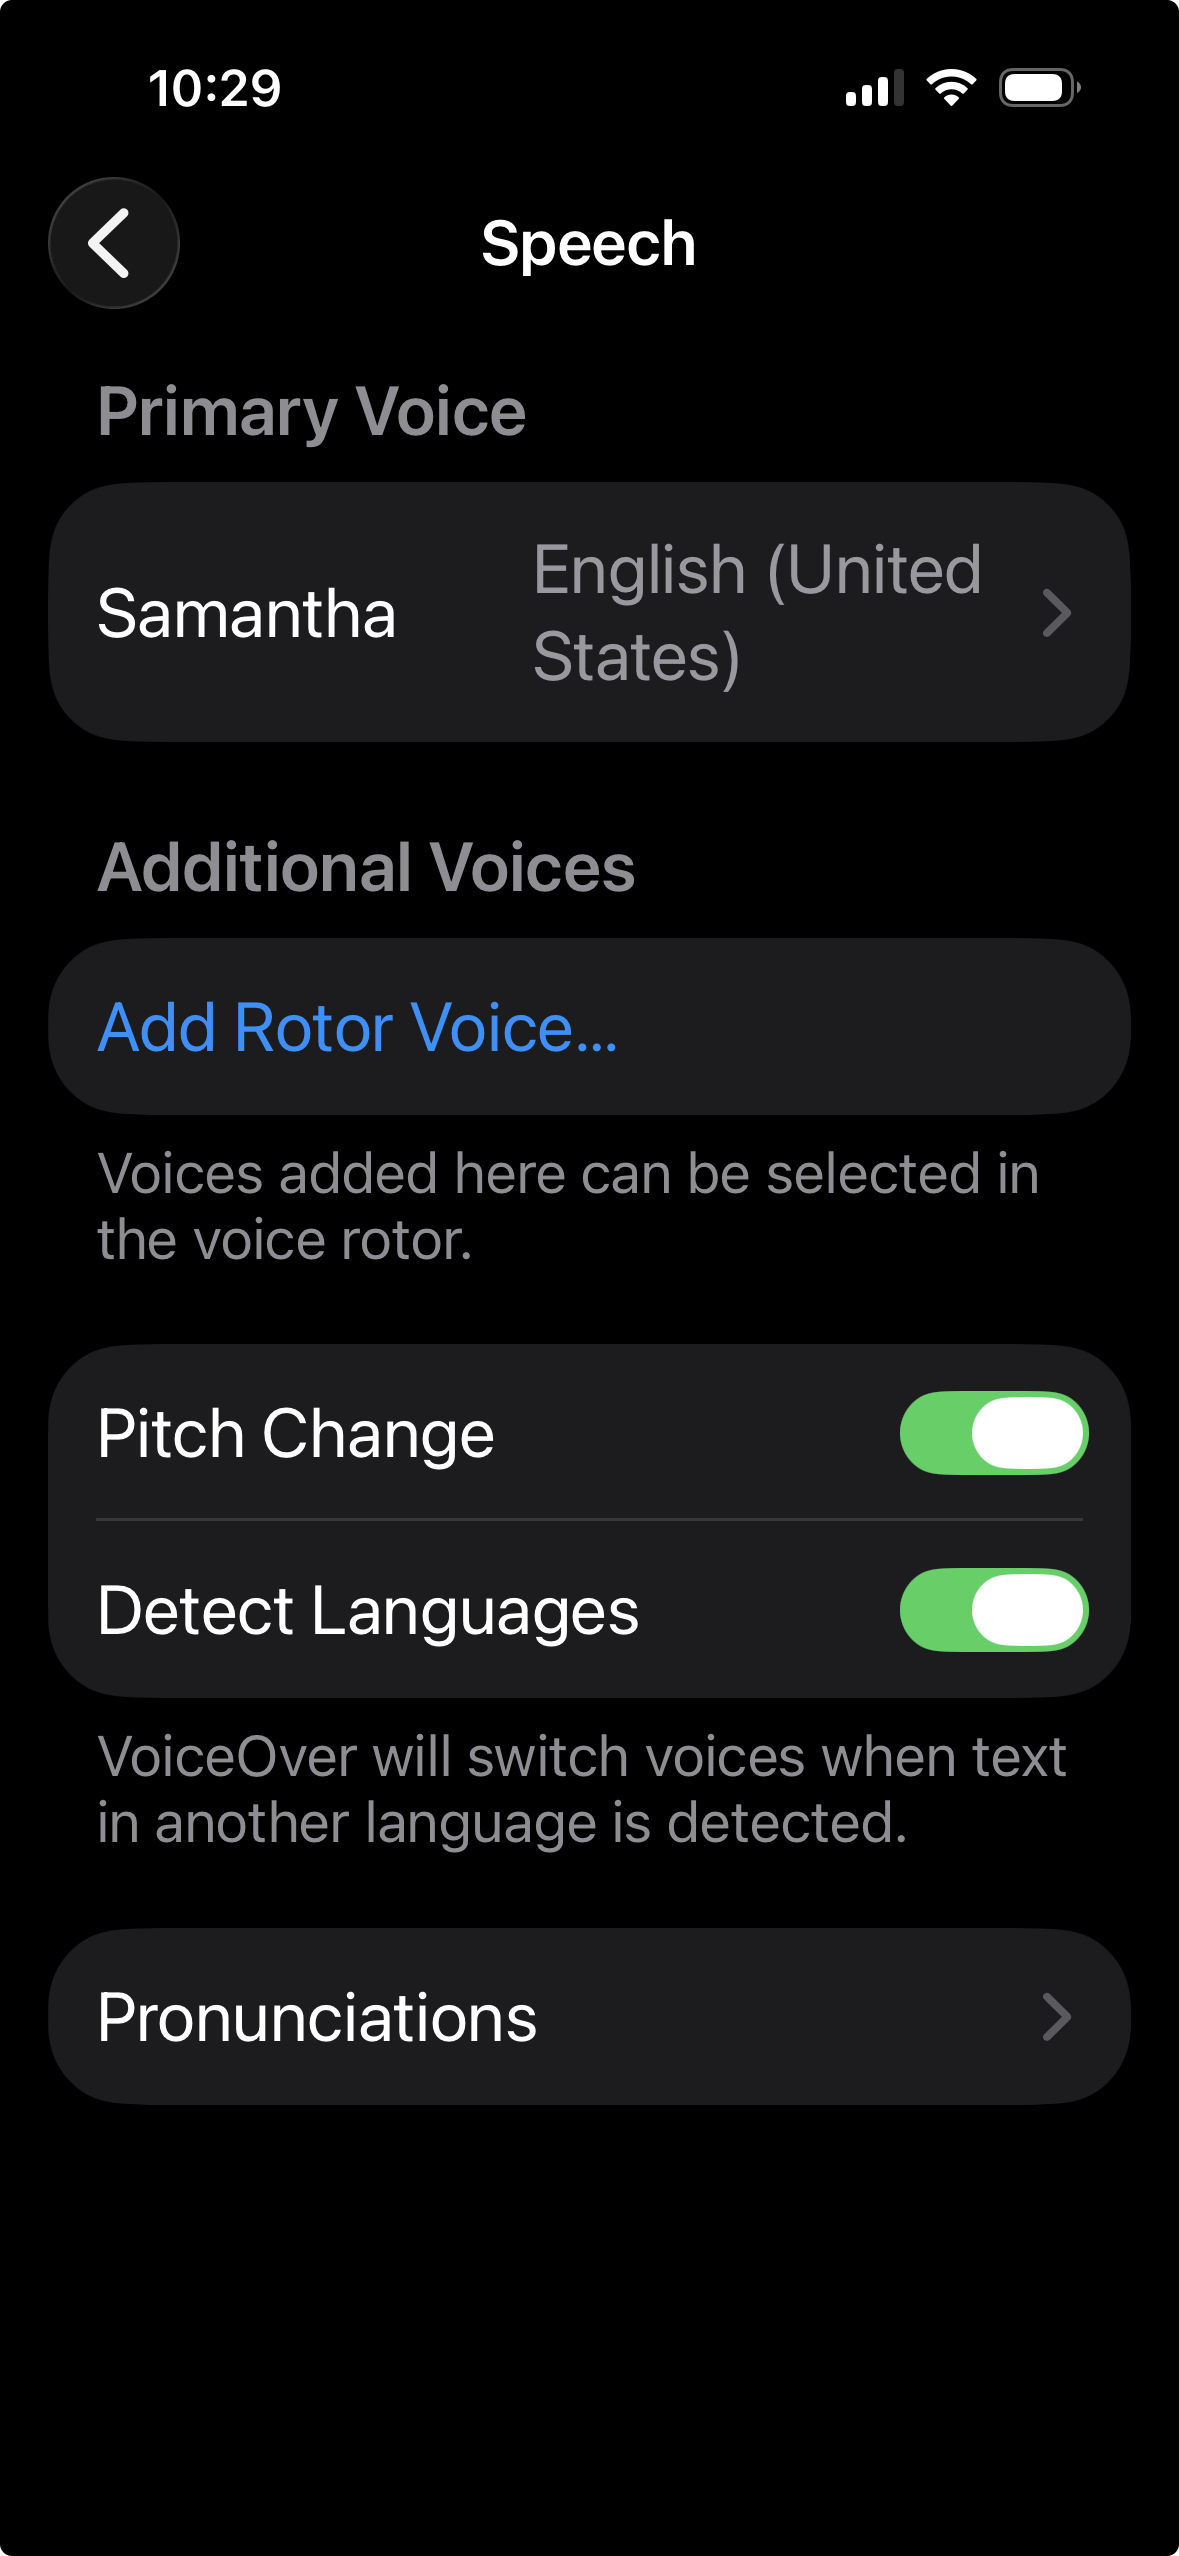
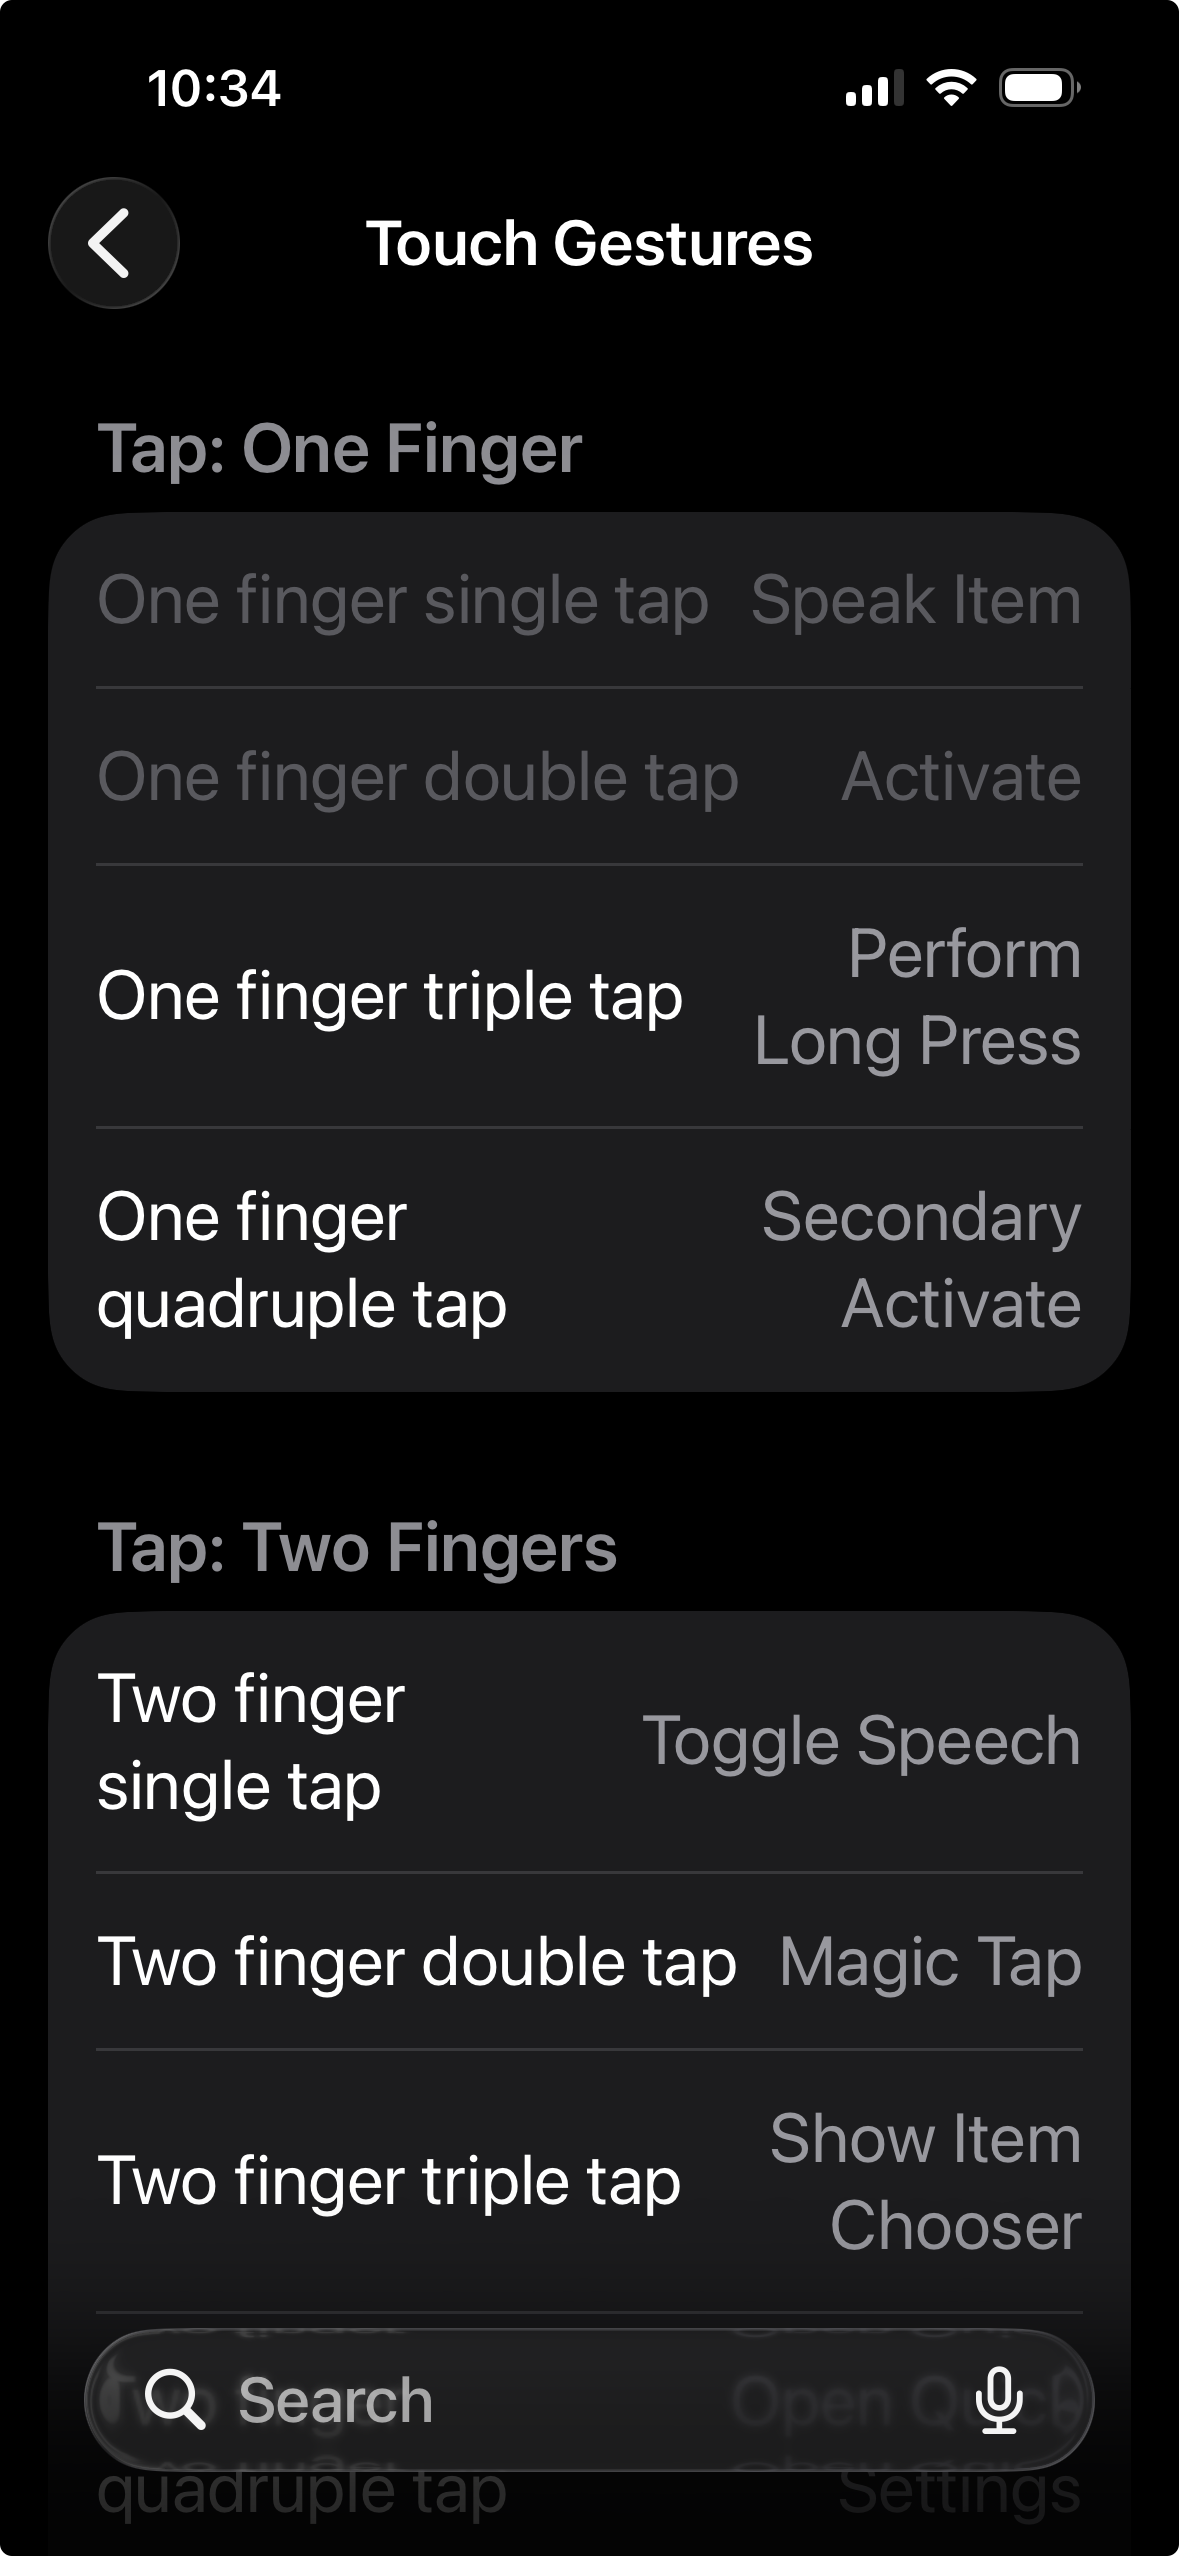
Note: Settings › Accessibility › VoiceOver also includes Braille settings for braille displays and braille screen input, VoiceOver Recognition features that describe images and screen content, and Verbosity and Audio settings that control hints, sounds, and haptic feedback. You don't need to change them for basic testing.
Cheat sheet
Everyday gestures
| Task | Gesture |
|---|---|
| Turn VoiceOver on or off | Triple-click the side button (with the Accessibility Shortcut set) |
| Pause or continue speech | Two-finger tap |
| Move to the next or previous element | One-finger swipe right / left |
| Select the element under your finger | Touch or drag one finger on the screen |
| Activate the selected element | One-finger double tap |
| Perform a long press | One-finger triple tap |
| Choose a rotor setting | Rotate two fingers on the screen |
| Move by the rotor setting | One-finger swipe down / up |
| Scroll one page | Three-finger swipe up / down |
| Read the screen from the top | Two-finger swipe up |
| Read from the selected element | Two-finger swipe down |
| Go back or dismiss an alert | Two-finger scrub (“Z” shape) |
| Perform the main action, such as answering a call or playing media | Two-finger double tap (Magic Tap) |
| Mute or unmute VoiceOver | Three-finger double tap |
| Turn the screen curtain on or off | Three-finger triple tap |
App testing checklist
| Scenario | Expected outcome |
|---|---|
| Swiping through a screen | VoiceOver reaches every interactive element and all essential content, in a logical order |
| Controls | Each control is announced with a clear name, its type, and its state or value |
| Images | Meaningful images have a text alternative, and decorative images are skipped |
| Headings | Choosing Headings in the rotor and swiping down moves between the screen's section headings |
| Dialogs and new screens | Opening a dialog or a new screen moves the VoiceOver cursor into it |
Troubleshooting and team tips
- The phone doesn't respond to your taps? VoiceOver is on, so one tap only selects. Double-tap to activate, or triple-click the side button to turn VoiceOver off.
- VoiceOver reads a file name instead of a description? The image has no
accessibilityLabel, so VoiceOver falls back to the image's name. - A control is announced without a type, such as “button”? It is missing the correct accessibility trait.
- VoiceOver skips an element? It may be hidden from accessibility, for example with
isAccessibilityElement = false. - Gestures don't register? Try a quicker movement, especially for double taps and swipes, and keep some space between your fingers for multi-finger gestures.
Learn More
- Turn on and practice VoiceOver on iPhone, Apple Support
- Use VoiceOver gestures on iPhone, Apple Support
- Control VoiceOver using the rotor on iPhone, Apple Support